
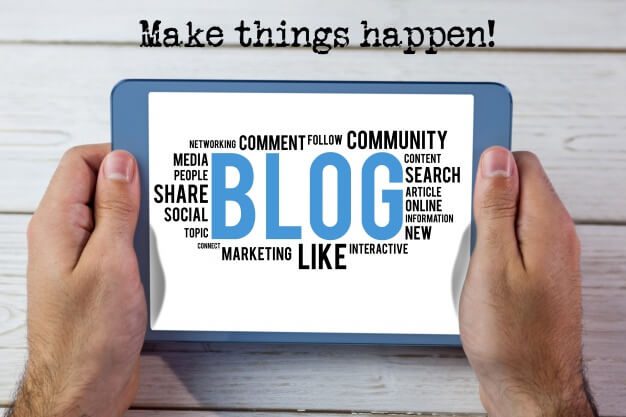
Everyone wants to start a blog and make money online; the idea of flexible work timings and being your own boss is compelling enough for people to try blogging. It is easy to succeed in working in a group, but doing it all alone without external support can be an extremely challenging proposition. Here is our complete guide on how to start a blog in 2018.
It is easy to have self-doubts while taking up blogging because you are trying something new that can change your life forever. The first thing that you need to realize as a newbie blogger is that your knowledge of blogging is limited. You may need to spend a lot of time during the initial period in order to understand the minute details of blogging.
I will help you with my knowledge of what I have learned over the years and avoid any unnecessary mistakes to become successful.
What is the best time to start a blog?
The best time to start a blog is right now. Not tomorrow, not next week and definitely not next month. Do not be complacent and wait any longer to start a blog because the longer you wait, the tougher the competition becomes. Start a blog RIGHT NOW and take your first step towards a successful blogging journey. The best way to be successful is to start doing every little thing that takes you closer towards your goal. You are looking for some blog examples? Read these technology blogs and learn how you can create your’s.
Step 1: Avoid mistakes made by the majority of new bloggers
Starting a blog can be a challenging task; Google search on “How to start a blog?” yields results in which majority of articles that are recommending you to sign up for web hosting program and earn commissions by doing it. None of the articles provides systematic instructions on “How to start a blog?”
You do not need to spend your time to install WordPress, plugins, and themes especially if you are not software savvy. You need to have a web-hosting provider that gives you option for 1 click WordPress install and lets you customize it easily. This will save your time that you can use to do other blogging activities. The blog host should answer all your questions and provide necessary support in order to help you set up your blog successfully.
Step 2: Get your own domain name
You need a custom domain name in order to be successful. A domain name is the identity of your website. Domain names are easy to get and with so many extensions like .net and .in available, it is easy to get a domain name of your choice. A personal domain name has several advantages; some of them are as follows:
- It is easy to remember a custom domain name for your customers and friends.
- It makes you look professional since you are paying from your pocket towards the domain name. It makes people believe that you are taking blogging as a profession and are serious about it.
- It helps you in SEO, a domain name helps you rank better if you have included a targeted keyword in the domain name. The first thing that search engine bots notice is your blog URL and the keywords used in URL get priority over the keywords mentioned in title, description and blog content.
- If you want to build a brand image for your blog, your domain name will go a long way to help it make a reality.
Step 3: Choose the right blogging platform and web host
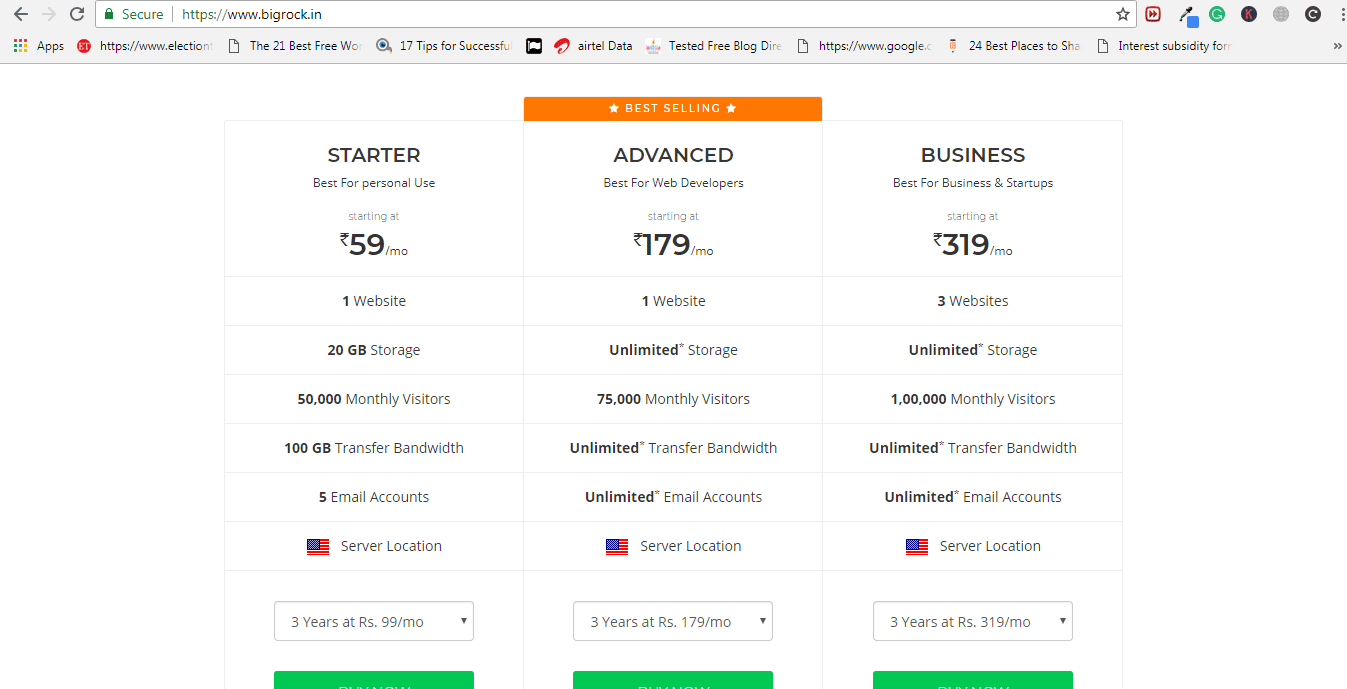
Once you have purchased a domain name for your website, it is time to decide the blogging platform for your website. The two major blogging platforms are Blogger and WordPress. Choose the platform that is best suited for you. Both have their share of advantages and disadvantages; choose the one that you are most comfortable because the installation of plugins/widgets is different in each. It can be helpful if you have money upfront to spend on customized website design, personalized logo, and layout. This helps your blog stand out from several other blogs using the free themes and layout.
Choose web hosts that offer 1 click installs, otherwise, you will spend several days getting your website ready and online on the world wide web.
Step 4: Setup your blog
Since more than half of the websites are using WordPress platform, we will limit our discussion to WordPress blogs only. Once you have created a web hosting account, you need to log in to the wp-admin panel of the account. Choose the right domain and then select 1 click WordPress install option. Within minutes, WordPress installs complete and you are ready for the next step. Next step involves selecting a theme for your blog. A lot of people make mistake at this step and choose a theme full of images and flash objects. This will reduce the speed of your blog and potentially drive away visitors coming to your blog. Blog speed also affects the SEO. Search engines may not index a blog with the majority of flash objects and images properly. Search engine bots are looking for pages full of content and if they find a site with very less content, they may avoid indexing such pages. Choose a theme in which the blog pages take no more than 3 seconds to load completely. If you want your blog to be different from other blogs, you may choose to buy a premium theme and spend extra money to customize it according to your needs.
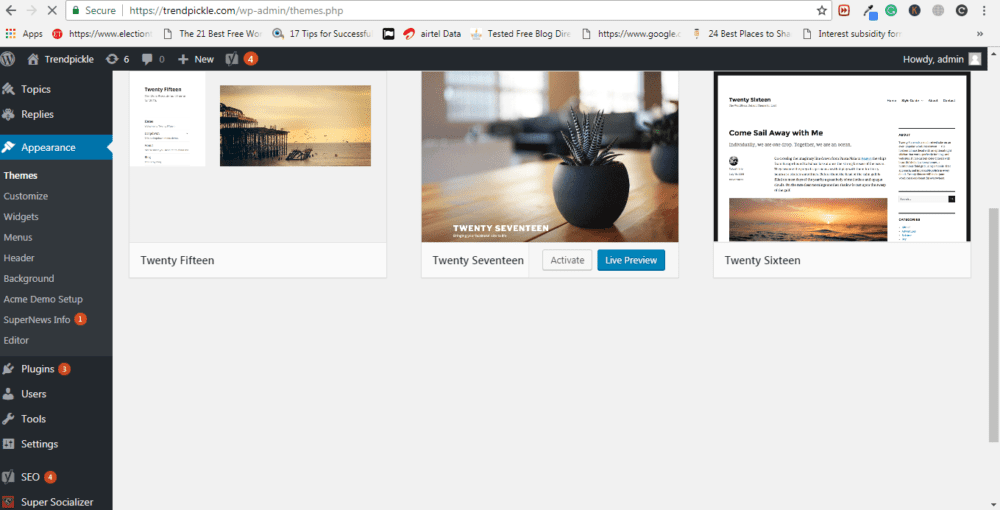
To install a theme, you need to go to WordPress dashboard go to Appearance tab and select Themes and then Add New option. If you are installing own theme, you need to browse to the folder where the theme is located, select the theme.zip file and click on Install now. After installation is complete, click on Activate to activate the theme. Once the Theme is activated, you can select the customize option and customize your blog further. You can choose the Site Title, Tagline and icon for your blog from the Site Identity tab. Several other options like Background Colour, Image and Menu are available to customize the blog.
Once the appearance of your blog is set up, it is time to add widgets to your blog. You must add widgets for SEO, analytics and comments spam detection to help you as a beginner. Most of the widgets are free to use and easy to install on your blog. Choose widgets only from trusted sources only. Widgets from other sources can steal information from your blog and your site visitors. You can add widgets to your sidebar, footer, header depending on the blog theme.
Once you are happy with the changes made to the layout of your blog, it is time to see your blog live. From the Dashboard, select your site name and click on visit site option to see how the blog appears. There may not be any posts live on your blog except the default one now.